Combat
This section explains the mechanics of combat in Guild Wars 2. Although the game might look similar to many other MMOs, there are a few differences that are not immediately obvious, but which nevertheless are important.
Dodging and moving
One of the main things that makes Guild Wars 2 combat feel very fluid is that almost all abilities can be activated while you are moving, and it's important to do so whenever possible to avoid damage, rather than standing there like a turret getting hit. The main exceptions to this are the various 'channelled' skills - ones where your character is performing a long sequence of attacks that can take 2 or 3 seconds.
Dodging is another fundamental aspect of combat: it prevents you from taking any damage for a brief time, allowing you to avoid heavy attacks that would otherwise take away a large amount of your health, or knock you over leaving you vulnerable.
By default, the game is set up so you can double-press on a movement key to Dodge. This is unfortunate for two reasons: first, it's a little slower than pressing a single dedicated Dodge key, and second it can cause you to Dodge unintentionally on Jumping Puzzles when trying to perform many small, short movements.
I strongly recommend disabling the double-press option and binding Dodge to a convenient key.
Attacking enemies
The attacks available to you depend on two things: what profession (aka class) you're playing, and the weapon(s) you have equipped. The latter point is very important: different weapon types each have their particular specialities, and you need to learn which ones are appropriate for a given encounter.
For example, on a Warrior, using a Hammer gives you access to attacks based around controlling your enemy: knocking them down, pushing them away, or weaking their attacks. Alternatively, using a Mace and a Shield together is a more defensive setup, letting you block hits and interrupt attacks.
Knowing your attacks
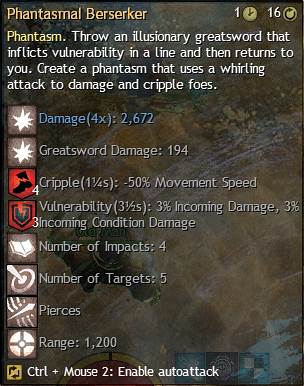
Each skill in the game has a tooltip explaining what it does: simply move the mouse pointer over it and a box appears detailing how much damage the skill does, its range, and so on. Here's an example:
The icons in the top right are important:
 Activation time
- Also known as cast time, this is simply how long it takes to activate a skill, in seconds. If this is not present, it means the skill can be cast instantly, even during the activation of another skill.
 Recharge time
- Also known as cooldown, this is how long you must wait after activating a skill before you can use it again. If this is not present, there is a minimum recharge time of around half a second.
The range of a skill, given in arbitrary, unnamed units, defines the maximum distance at which you can hit an enemy with the skill. If you're not in range, the skill will have a thin red bar below it. On the left, in range; on the right, out of range:


It can be a little tricky to get used to what the different numbers mean. Generally, though, 200 is short range, 600 is medium range, and 1200 is long range. Getting a feel for these distances is mostly a matter of experience.
Some skills have a red crosshair at the bottom of the icon, like this:

This means you must choose where to aim them on the ground; as you might expect, they are area-of-effect skills. I recommend going to Options → Combat/Movement and setting the Ground Targeting option to Fast with Range Indicator and enabling the Lock Ground Target at Maximum Skill Range option. This way you won't accidentally get 'Out of range' errors when trying to aim at distant points.
Boons & conditions
Like other MMOs, Guild Wars 2 has the concept of persistent positive and negative effects. Positive effects are split into two categories:
 Boons
Boons- These are short-term effects represented by an white icon on an orange background, with a white border indicating the time remaining on them. There are a small number of Boons, and they're shared across Professions, and include things like Regeneration, Might and so on.
 Buffs
Buffs- These are Profession-specific effects, such a Guardian's Strength In Numbers, or effects from things like food or the environment.
Negative effects are also split into two categories:
 Conditions
- Like Boons these are a specific set of short-term effects, represented by a black icon on a red background, with a white border to indicate the time remaining on them. Also like Boons, they are shared across the Professions, and include things like Bleeding, Vulnerability and so on.
 Debuffs
- Like Buffs, these appear as full-colour icons, and can come from a variety of sources.
Boons and Conditions are the primary short-term in-combat effects, usually only lasting a few seconds. With the right equipment and stats, they can be very potent, so it's important to decide what sort of playstyle you want to focus on: do you want to use raw power to kill enemies, or melt them down over time with powerful Bleeding and Burning effects? Perhaps you want to support your allies with Might, increasing the damage of their attacks, or provide Protection so they take less damage? Examine your weapon and utility skills and how they're affected by traits and skills to determine what works best for you.
Controlling enemies
There are a number of Conditions that affect enemy movement, such as Cripple, Chill and Immobilise. These along with other skills like Stuns, Dazes and Knockdowns are what is collectively known as Crowd Control, or CC for short.
Interrupting enemy abilities and controlling their movement is an important part of Guild Wars 2 combat, not only to help you stay alive, but because of they way they affect Defiance Bars.
Defiance Bars
Also known as Break Bars, these appear on powerful enemies and indicate that the enemy is immune to normal Crowd Control effects. Instead, these effects reduce the teal-coloured bar below the enemy's health bar. The official Guild Wars 2 Wiki has a detailed explanation of the mechanics of defiance bars.
The main thing to be aware of is when you're facing enemies with the 'Locked' bar type. These bars only become vulnerable to Crowd Control abilities and Conditions for a short time, and reducing the bar quickly to zero is often important for the success of the encounter. So, when you go up against enemies like this it helps to have one or more skills equipped that have strong Crowd Control effects, such as Stuns, Fears or Knockdowns. You'll often see people in map chat or local chat shouting "CC!" when the bar is ready to be 'broken'.